Open-Wrt: Add hello world application
In this section, you are going to learn
How to create a simple application in Open-WRT ?
How to generate full openwrt image for RPI-4B ?
How to flash full openwrt image for RPI-4B ?
How to run minicom and work remotely with RPI-4B ?
Topics in this section,
Step 1: Add custom application
Step 2 : Add application package to menuconfig
Step 3 : Update and install feeds
Step 4 : Enable application package in menuconfig
Step 7.2 : Check the “objdump” output of the application binary file
Step 7.3 : Check the “readelf” output of the application binary file
Step 7.4 : Check the “nm” output of the application binary file
Step 7.5 : Check the “file” command output of application binary file
Step 7.6 : Check the “size” command output of application binary file
Step 7.7 : Check the “strings” command output of application binary file
Step 8: Build full openwrt - Incremental
Step 1: Clone
$ cd $HOME

$ git clone https://github.com/openwrt/openwrt.git

$ cd openwrt
Step 2: Update and install latest feeds
$ ./scripts/feeds update -a

$ ./scripts/feeds install -a
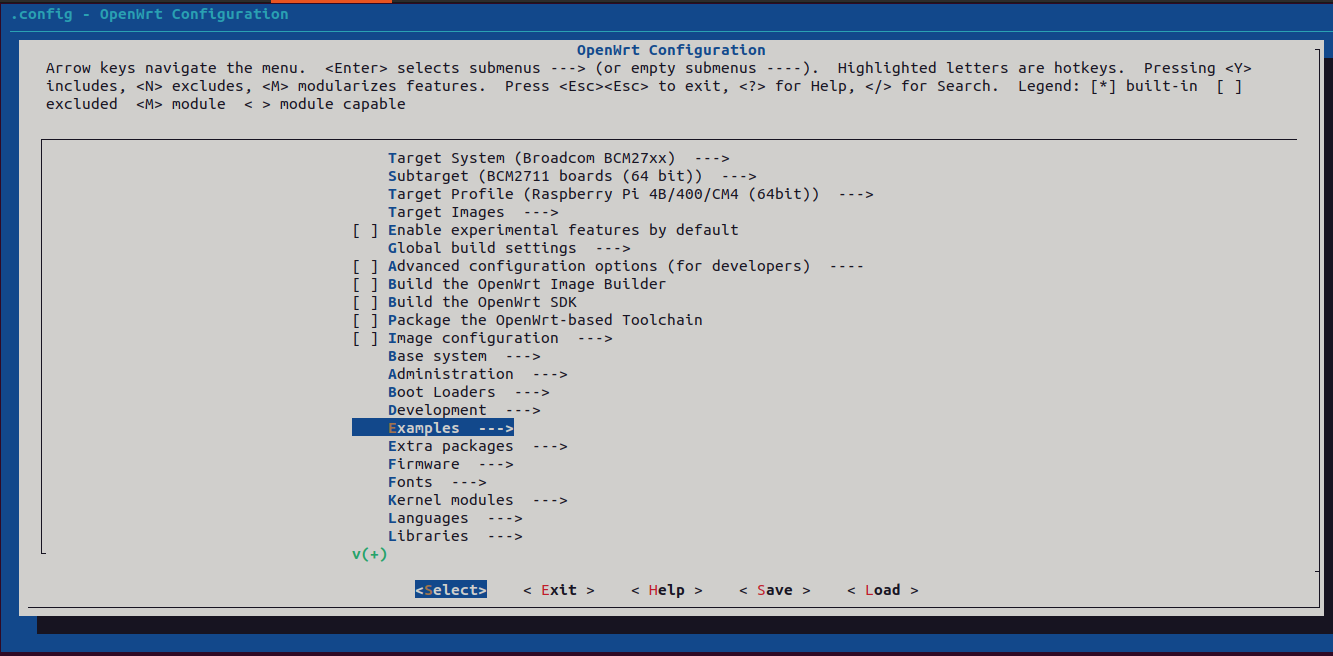
Step 3: Do make menuconfig
$ make menuconfig
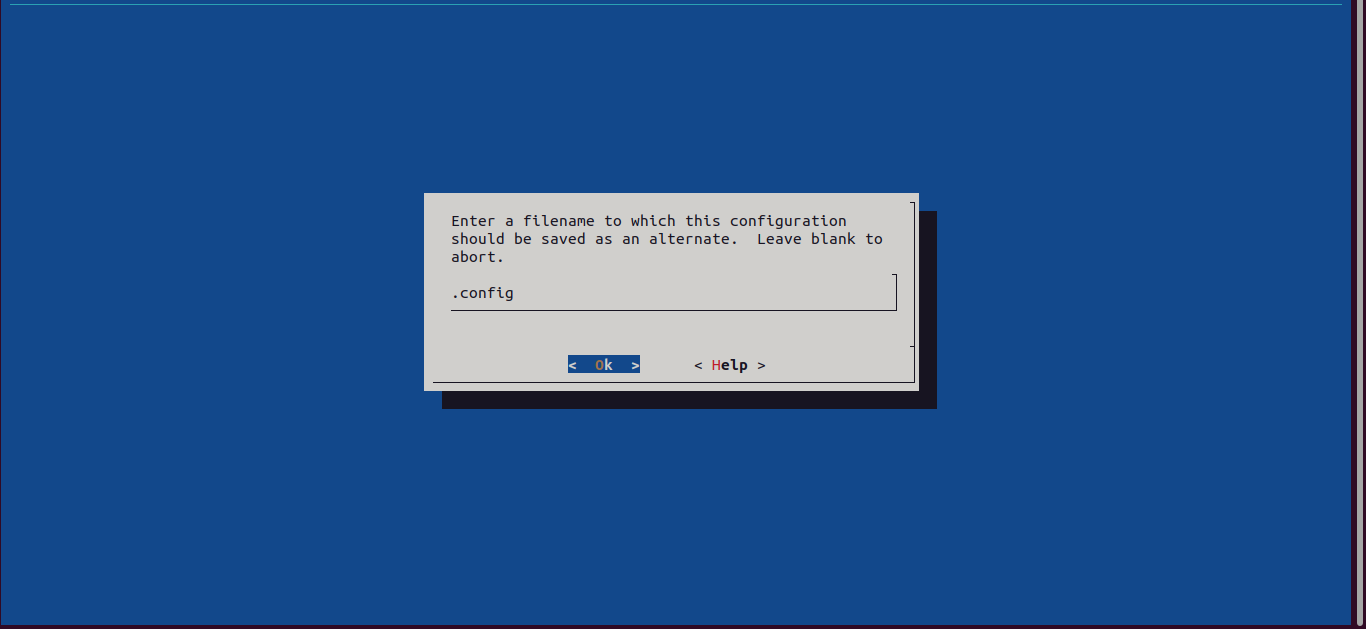
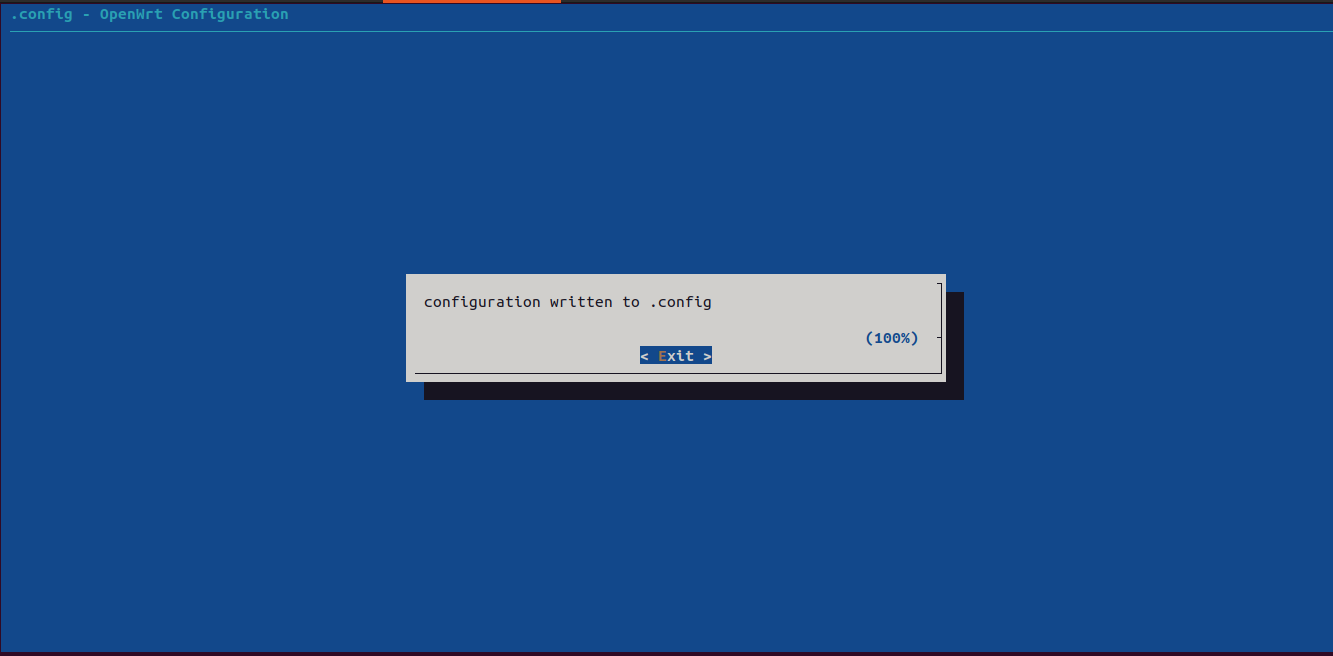
Step 4: Save the configuration
Step 5: Exit the menuconfig
Step 6: Check .config file
Step 6.1: In menuconfig select Network and sub Network of WirelessAPD there will enable
Make sure the current directory “openwrt”
In .config file package should be enabled in ‘y’
Check those lines in .config file
CONFIG_PACKAGE_hostapd=y
CONFIG_PACKAGE_hostapd-basic=m
CONFIG_PACKAGE_hostapd-basic-openssl=m
CONFIG_PACKAGE_hostapd-basic-wolfssl=m
CONFIG_PACKAGE_wpa-cli=y
CONFIG_PACKAGE_wpa-supplicant=y
CONFIG_PACKAGE_wpa-supplicant-basic=m
CONFIG_PACKAGE_wpa-supplicant-mini=m
CONFIG_PACKAGE_wpa-supplicant-openssl=m
CONFIG_PACKAGE_wpa-supplicant-p2p=m
CONFIG_PACKAGE_wpa-supplicant-wolfssl=m
CONFIG_PACKAGE_wpad-basic-wolfssl=m
Step 6.2: In menuconfig select Network
Make sure the current directory “openwrt”
In .config file package should be enabled in ‘y’
Check those lines in .config file
CONFIG_PACKAGE_ethtool=y
CONFIG_PACKAGE_fping=y
CONFIG_PACKAGE_iperf=y
CONFIG_IPERF_ENABLE_MULTICAST=y
CONFIG_PACKAGE_iperf3=y
CONFIG_PACKAGE_iputils-arping=y
CONFIG_PACKAGE_iputils-ping=y
CONFIG_PACKAGE_tcpdump=y
Step 6.3: In menuconfig select Base System
Make sure the current directory “openwrt”
In .config file package should be enabled in ‘y’
Check those lines in .config file
CONFIG_PACKAGE_procd-ujail=y
CONFIG_PACKAGE_swconfig=y
CONFIG_PACKAGE_uci=y
CONFIG_PACKAGE_urandom-seed=y
CONFIG_PACKAGE_urngd=y
CONFIG_PACKAGE_wireless-tools=y
Step 7: Build
$ make
 make[1] world
 make[2] target/compile
 make[3] -C target/linux compile
 make[2] buildinfo
 make[3] diffconfig buildversion feedsversion
 make[2] package/cleanup
 make[2] package/compile
 .
 .
 make[2] target/install
 make[3] -C target/linux install
 make[2] package/index
 make[2] json_overview_image_info
 make[2] checksum
Step 8: Check the location of the image
$ pwd

  /home/test/openwrt
$HOME/openwrt/bin/targets/bcm27xx/bcm2711/

$ ls -l

  -rw-r--r-- 1 sysadmin sysadmin     1527 Dec 29 19:45 config.buildinfo
  -rw-r--r-- 1 sysadmin sysadmin     83 Dec 29 19:45 feeds.buildinfo
  -rw-r--r-- 1 sysadmin sysadmin     17075452 Dec 29 19:47 openwrt-bcm27xx-bcm2711-rpi-4-ext4-factory.img.gz
  -rw-r--r-- 1 sysadmin sysadmin     17076299 Dec 29 19:47 openwrt-bcm27xx-bcm2711-rpi-4-ext4-sysupgrade.img.gz
  -rw-r--r-- 1 sysadmin sysadmin     4126 Dec 29 19:47 openwrt-bcm27xx-bcm2711-rpi-4.manifest
  -rw-r--r-- 1 sysadmin sysadmin     15316637 Dec 29 19:47 openwrt-bcm27xx-bcm2711-rpi-4-squashfs-factory.img.gz
  -rw-r--r-- 1 sysadmin sysadmin     15317484 Dec 29 19:47 openwrt-bcm27xx-bcm2711-rpi-4-squashfs-sysupgrade.img.gz
  drwxr-xr-x 2 sysadmin sysadmin     4096 Dec 29 19:47 packages
  -rw-r--r-- 1 sysadmin sysadmin     2141 Dec 29 19:47 profiles.json
  -rw-r--r-- 1 sysadmin sysadmin     912 Dec 29 19:47 sha256sums
  -rw-r--r-- 1 sysadmin sysadmin     18 Dec 29 19:45 version.buildinfo
In this section you will learn how to add custom application
Make sure the current directory “openwrt”
$ pwd

  /home/test/openwrt
Make sure the current directory “openwrt”
$ cd package

$ mkdir -p mypackages/examples/helloworld

$ cd mypackages/examples/helloworld/helloworld
Create helloworld.c file using vim command
vim helloworld.cContent of helloworld.c
#include <stdio.h>

void app_fun(void)
{
        printf("Hi, application\n");
}

int main(void)
{
        printf("Hello, world!\n");
        app_fun();

        return 0;
 }
Create Makefile file using vim command
vim MakefileContent of Makefile
include $(TOPDIR)/rules.mk

PKG_NAME:=helloworld
PKG_VERSION:=1.0
PKG_RELEASE:=1

SOURCE_DIR:=$(TOPDIR)/package/mypackages/examples/helloworld

include $(INCLUDE_DIR)/package.mk

define Package/helloworld
SECTION:=examples
CATEGORY:=Examples
TITLE:=Hello, World!
endef

define Package/helloworld/description
A simple "Hello, world!" -application.
endef

define Build/Prepare
        mkdir -p $(PKG_BUILD_DIR)
        cp $(SOURCE_DIR)/helloworld.c $(PKG_BUILD_DIR)
        cp $(SOURCE_DIR)/Makefile $(PKG_BUILD_DIR)
        $(Build/Patch)
endef

define Build/Compile
        $(TARGET_CC) $(TARGET_CFLAGS) -o $(PKG_BUILD_DIR)/helloworld.o -c $(PKG_BUILD_DIR)/helloworld.c
        $(TARGET_CC) $(TARGET_LDFLAGS) -o $(PKG_BUILD_DIR)/$1 $(PKG_BUILD_DIR)/helloworld.o
endef

define Package/helloworld/install
        $(INSTALL_DIR) $(1)/usr/bin
        $(INSTALL_BIN) $(PKG_BUILD_DIR)/helloworld $(1)/usr/bin
endef

$(eval $(call BuildPackage,helloworld))
Explanation of include $(TOPDIR)/rules.mk
include $(TOPDIR)/rules.mk
The $(TOPDIR) is expected to be the top-level directory of the project
/rules.mk - The path to the file to be included
What is $(TOPDIR) ?
See Answer
$(TOPDIR) path is /home/test/openwrt
Explanation of Package Name, Version and Release number Block
PKG_NAME:=helloworld
PKG_VERSION:=1.0
PKG_RELEASE:=1
The name and version of your package are used to define the variable to point to the build directory of your package (Ex: helloworld-1.0)
Explanation of SOURCE_DIR
SOURCE_DIR:=$(TOPDIR)/package/mypackages/examples/helloworld
What is SOURCE_DIR ?
See Answer
SOURCE_DIR is relative or absolute path of directory
In this case path of SOURCE_DIR $HOME/openwrt/package/mypackages/examples/helloworld
Give path of the source directory
SOURCE_DIR is used in Build/Prepare
Explanation of include $(INCLUDE_DIR)/package.mk
include $(INCLUDE_DIR)/package.mk
$(INCLUDE_DIR) - Directory containing include files
/package.mk: The path to the file to be included
What is $(INCLUDE_DIR) ?
See Answer
$(INCLUDE_DIR) - It will search for included files
In this case path of $(INCLUDE_DIR) $HOME/openwrt/include
Explanation of Package Information
define Package/helloworld
SECTION:=examples
CATEGORY:=Examples
TITLE:=Hello, World!
endef
This block defines the package information as section, category, and title
SECTION: examples: This line tells the section to which the package belongs. In this case, the package will come under the “examples” section.
CATEGORY: Examples: This line tells the category to which the package belongs. In this case, the category is set to “Examples
TITLE: Hello, world This line tells, title or name of the package. In this case, the title is set to “Hello, world!”.
endef: This line will be the end of the define block.
What all information included in Package Information Block ?
See Answer
It includes section, category, and title
Explanation of Package Description
define Package/helloworld/description
A simple "Hello, world!" -application.
endef
This function defines of package.
What is Package Description Block ?
See Answer
Instructs on how and where our package will appear in the overall configuration menu
Explanation of Build/Prepare
define Build/Prepare
        mkdir -p $(PKG_BUILD_DIR)
        cp $(SOURCE_DIR)/helloworld.c $(PKG_BUILD_DIR)
        cp $(SOURCE_DIR)/Makefile $(PKG_BUILD_DIR)
        $(Build/Patch)
endef
mkdir -p $(PKG_BUILD_DIR): This line creates the build directory
cp $(SOURCE_DIR)/helloworld.c $(PKG_BUILD_DIR): This line copies the contents from SOURCE_DIR (source) to PKG_BUILD_DIR (destination)
$(Build/Patch): This line includes a call to $(Build/Patch), which is a variable or macro typically defined elsewhere in the Makefile. It is used to apply any necessary patches to the source code.
What is -r ?
See Answer
-r is recursive copy.
Which path $(PKG_BUILD_DIR) ?
See Answer
In this case path of $(PKG_BUILD_DIR) $HOME/openwrt/build_dir/target-aarch64_cortex-a72_musl/helloworld-1.0
What is SOURCE_DIR ?
See Answer
In this case path of SOURCE_DIR $HOME/openwrt/package/mypackages/examples/helloworld
Explanation of Build/Compile
define Build/Compile
        $(TARGET_CC) $(TARGET_CFLAGS) -o $(PKG_BUILD_DIR)/helloworld.o -c $(PKG_BUILD_DIR)/helloworld.c
        $(TARGET_CC) $(TARGET_LDFLAGS) -o $(PKG_BUILD_DIR)/$1 $(PKG_BUILD_DIR)/helloworld.o
endef
This block defines the compilation process.
$(TARGET_CC): It is said to arm cross compiler and it is defined globally
$(TARGET_CFLAGS): It is used for additional flags
-o $(PKG_BUILD_DIR)/helloworld.o: Takes .c input file and generates .o output file in location $(PKG_BUILD_DIR)
-o $(PKG_BUILD_DIR)/$1: The final helloworld binary will be placed in the build directory ($(PKG_BUILD_DIR)).
What is $(TARGET_CC) ?
See Answer
It is said to arm cross compiler
In this case path of $(TARGET_CC) $HOME/openwrt/staging_dir/toolchain-aarch64_cortex-a72_gcc-12.3.0_musl/bin
What is $(TARGET_CFLAGS) ?
See Answer
It is used for additional flags
Explanation of Package Install
define Package/helloworld/install
        $(INSTALL_DIR) $(1)/usr/bin
        $(INSTALL_BIN) $(PKG_BUILD_DIR)/helloworld $(1)/usr/bin
endef
$(INSTALL_DIR): It used for creating a directory and it is commonly used in build systems like OpenWrt.
$(INSTALL_BIN): It used for copying an executable file.
/usr/bin: It is the destination directory, binary file will be installed.
What is $(INSTALL_DIR) ?
See Answer
It used for creating a directory
In this case $(INSTALL_DIR) install -d -m0755
Install command is used to copy files and set attributes.
-d, –directory : It will act as directory names towards all arguments.
m, –mode=MODE : Set permission mode (as in chmod).
What is $(INSTALL_BIN) ?
See Answer
It used for copying an executable file.
In this case $(INSTALL_BIN) install -m0755
m, –mode=MODE : Set permission mode (as in chmod).
What is $(1)/usr/bin ?
See Answer
/usr/bin: It is the destination directory where the binary executable will be installed.
In this case path of $(1)/usr/bin $HOME/openwrt/build_dir/target-aarch64_cortex-a72_musl/helloworld-1.0/.pkgdir/helloworld/usr/bin
Explanation of Package Build
$(eval $(call BuildPackage,helloworld))
BuildPackage: It is function call with helloworld as parameter.
In this section you will learn how to add menuconfig
Make sure the current directory is “openwrt”
Create new feeds.conf file using vim command in openwrt directory
$ vim feeds.conf
Inside feeds.conf
src-link <name> <path>
Make sure the current directory is “openwrt”
Create new feeds.conf file using vim command in openwrt directory
src-link mypackages /home/test/openwrt/package/mypackages
In this section you will learn how to install and update feeds
Installs the most recent packages, replacing any earlier versions that were already on your system
$ ./scripts/feeds update -a

$ ./scripts/feeds install -a -f
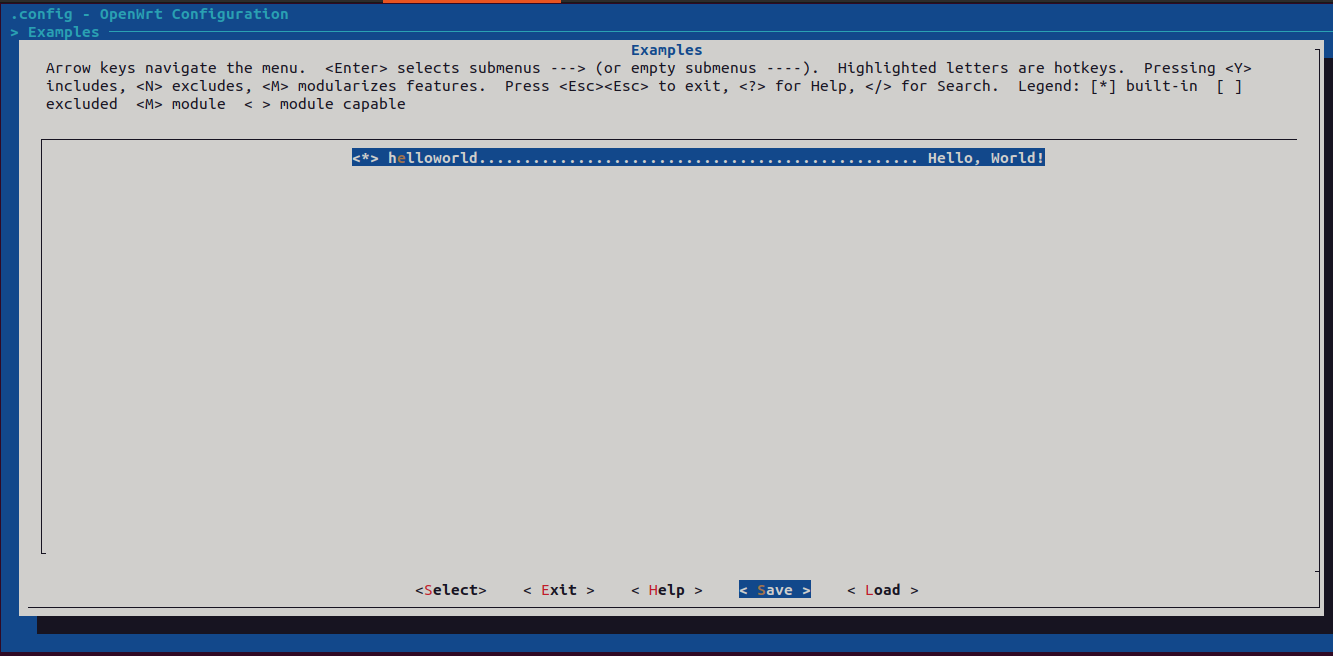
In this section you will learn how to enable in menuconfig
Select your category that reflects in menuconfig
Go inside examples and select helloworld
In this section you will learn how to do Pre-build checks
In .config file package should be enabled in ‘y’
Below line should be present in .config file
CONFIG_PACKAGE_helloworld=y
Make sure the current directory “openwrt”
$HOME/openwrt/staging_dir/toolchain-aarch64_cortex-a72_gcc-12.3.0_musl/aarch64-openwrt-linux-musl
$ ls -l

 drwxr-xr-x 2 sysadmin sysadmin 4096 Dec 23 02:58 bin
 drwxr-xr-x 3 sysadmin sysadmin 4096 Dec 23 03:39 include
 lrwxrwxrwx 1 sysadmin sysadmin    6 Dec 23 03:39 lib -> ../lib
 lrwxrwxrwx 1 sysadmin sysadmin    8 Dec 23 03:20 lib64 -> ../lib64
 lrwxrwxrwx 1 sysadmin sysadmin   10 Dec 23 03:39 sys-include -> ../include
Make sure the current directory is ‘helloworld-1.0’
$HOME/openwrt

$ make package/helloworld/compile
In this section you will learn about post build checks
Make sure the current directory is ‘helloworld-1.0’
$ pwd

  /home/test/openwrt

$HOME/openwrt/build_dir/target-aarch64_cortex-a72_musl/helloworld-1.0

$ ls -l

  -rwxr-xr-x 1 sysadmin sysadmin        72880 Dec 29 19:46 helloworld
  -rw-r--r-- 1 sysadmin sysadmin        146 Dec 29 19:46 helloworld.c
  -rw-r--r-- 1 sysadmin sysadmin        1992 Dec 29 19:46 helloworld.o
   drwxr-xr-x 3 sysadmin sysadmin       4096 Dec 29 19:46 ipkg-aarch64_cortex-a72
  -rw-r--r-- 1 sysadmin sysadmin        1430 Dec 29 19:46 Makefile
See that binary called helloworld is present inside directory ?
See Answer
$HOME/openwrt/build_dir/target-aarch64_cortex-a72_musl/helloworld-1.0
$ ls -l
-rwxr-xr-x 1 sysadmin sysadmin 72880 Dec 29 19:46 helloworld
Let check objdump” output of the application binary file
objdump -t : Displays the symbols of application binary file
Check if “main” is present or not in the “objdump”
$HOME/openwrt/staging_dir/toolchain-aarch64_cortex-a72_gcc-12.3.0_musl/aarch64-openwrt-linux-musl/bin/objdump -t helloworld | grep -i main

00000000004004f0 g     F .text     0000000000000024              main
What is “-t” option is used in “objdump” command ?
See Answer
-t: Displays the symbols of application binary file
What “objdump” command does ?
See Answer
objdump: Display information from object files
Check if “app_fun” is present or not in the “objdump”
$HOME/openwrt/staging_dir/toolchain-aarch64_cortex-a72_gcc-12.3.0_musl/aarch64-openwrt-linux-musl/bin/objdump -t helloworld | grep -i app_fun

00000000004005c0 g     F .text   000000000000000c              app_fun
Symbols “main” and “app_fun” are present in application binary file
Hence we can confirm application is compiled successfully
objdump -S : Display source code intermixed with disassembly
Check if “main” is present or not in the “objdump”
$HOME/openwrt/staging_dir/toolchain-aarch64_cortex-a72_gcc-12.3.0_musl/aarch64-openwrt-linux-musl/bin/objdump -S helloworld | grep -i main

00000000004004f0 <main>:
What is “-S” option is used in “objdump” command ?
See Answer
-S : Display source code intermixed with disassembly
What is the purpose of “objdump” command ?
See Answer
The main purpose of the objdump tool is to debug and understand the executable file
Check if “app_fun” is present or not in the “objdump”
$HOME/openwrt/staging_dir/toolchain-aarch64_cortex-a72_gcc-12.3.0_musl/aarch64-openwrt-linux-musl/bin/objdump -S helloworld | grep -i app_fun

400504: 9400002f        bl      4005c0 <app_fun>
00000000004005c0 <app_fun>:
Symbols “main” and “app_fun” are present in application binary file
Hence we can confirm application is compiled successfully
readelf -s: Display the symbol table
Check if “main” is present or not in the “readelf”
$HOME/openwrt/staging_dir/toolchain-aarch64_cortex-a72_gcc-12.3.0_musl/aarch64-openwrt-linux-musl/bin/readelf -s helloworld | grep -i main

79: 00000000004004f0    36 FUNC    GLOBAL DEFAULT   12 main
What is “-s” option is used in “readelf” command ?
See Answer
-s: Display the symbol table
What “readelf” command does ?
See Answer
readelf: Display information about ELF files
What is the purpose of “readelf” command ?
See Answer
The main purpose of the readelf tool is to display the headers of an ELF (Executable and Linkable Format) files
Check if “app_fun” is present or not in the “readelf”
$HOME/openwrt/staging_dir/toolchain-aarch64_cortex-a72_gcc-12.3.0_musl/aarch64-openwrt-linux-musl/bin/readelf -s helloworld | grep -i app_fun

81: 00000000004005c0    12 FUNC    GLOBAL DEFAULT   12 app_fun
Symbols “main” and “app_fun” are present in application binary file
Hence we can confirm application is compiled successfully
nm -S: Print both value and size of defined symbols for the “bsd” output style
Check if “main” is present or not in the “nm”
$HOME/openwrt/staging_dir/toolchain-aarch64_cortex-a72_gcc-12.3.0_musl/aarch64-openwrt-linux-musl/bin/nm -S helloworld | grep -i main

00000000004004f0 0000000000000024 T main
What is “-S” option is used in “nm” command ?
See Answer
-S: Print both value and size of defined symbols for the “bsd” output style
What “nm” command does ?
See Answer
nm is used to dump the symbol table and their attributes from a binary executable file.
What is the purpose of “nm” command ?
See Answer
The main purpose of the nm tool is to display information about symbols in the specified File, which can be an object file, an executable file, or an object-file library.
Check if “app_fun” is present or not in the “nm”
$HOME/openwrt/staging_dir/toolchain-aarch64_cortex-a72_gcc-12.3.0_musl/aarch64-openwrt-linux-musl/bin/nm -S helloworld | grep -i app_fun

00000000004005c0 000000000000000c T app_fun
Symbols “main” and “app_fun” are present in application binary file
Hence we can confirm application is compiled successfully
nm -s: When listing symbols from archive members, include the index: a mapping of which modules contain definitions for which names.
Check if “main” is present or not in the “nm”
$HOME/openwrt/staging_dir/toolchain-aarch64_cortex-a72_gcc-12.3.0_musl/aarch64-openwrt-linux-musl/bin/nm -s helloworld | grep -i main

00000000004004f0 T main
What is “-s” option is used in “nm” command ?
See Answer
-s: When listing symbols from archive members, include the index: a mapping of which modules contain definitions for which names.
Check if “app_fun” is present or not in the “nm”
$HOME/openwrt/staging_dir/toolchain-aarch64_cortex-a72_gcc-12.3.0_musl/aarch64-openwrt-linux-musl/bin/nm -s helloworld | grep -i app_fun

00000000004005c0 T app_fun
Symbols “main” and “app_fun” are present in application binary file
Hence we can confirm application is compiled successfully
file: Determine file type
$ file helloworld

helloworld: ELF 64-bit LSB executable, ARM aarch64, version 1 (SYSV), dynamically linked, interpreter /lib/ld-musl-aarch64.so.1, with debug_info, not stripped
Why “file” command is used ?
See Answer
file command is used to determine the file type.
size: List section sizes and total size of binary files
$ size helloworld

  text    data     bss     dec     hex filename
  1190     648      56    1894     766 helloworld
What “size” command does ?
See Answer
size command will display the output that will give you information on the size command in 5 values like data, text, dec, bss, and hex
strings - print the sequences of printable characters in files
As we can see string output are added in the program are confirmed.
$ strings helloworld | grep -i Hi

  Hi, application
What “strings” command does ?
See Answer
strings command is used to return the string characters into files.
Make sure the current directory “openwrt”
$HOME/openwrt/staging_dir/packages/bcm27xx
$ ls -l | grep -i "helloworld"

 lrwxrwxrwx 1 sysadmin sysadmin 126 Jan  2 11:51 helloworld_1.0-1_aarch64_cortex-a72.ipk -> /home/test/openwrt/bin/packages/aarch64_cortex-a72/mypackages/helloworld_1.0-1_aarch64_cortex-a72.ipk
ipk file: It is compressed archive format derived from the Debian package (. DEB) format
What is “IPK” file ?
See Answer
IPK file is a compressed archive format derived from the Debian package (. DEB) format
Make sure the current directory “openwrt”
$HOME/openwrt/staging_dir/packages/bcm27xx
Command to extract .ipk file is below
$ tar -xzf helloworld_1.0-1_aarch64_cortex-a72.ipk
$ ls

  control.tar.gz
  data.tar.gz
  debian-binary
what is the command to extract IPK file ?
See Answer
tar -xzf helloworld_1.0-1_aarch64_cortex-a72.ipk
First extract control.tar.gz and data.tar.gz
Command to check content for control.tar.gz file is below
$ tar -xzvf control.tar.gz

./control
./postinst
./prerm
Check ./control using “vim command”
$ vim ./control
Content of ./control
Package: helloworld
Version: 1.0-1
Depends: libc
Source: package/mypackages/examples/helloworld
SourceName: helloworld
Section: examples
SourceDateEpoch: 1703276774
Architecture: aarch64_cortex-a72
Installed-Size: 1244
Description:  A simple "Hello, world!" -application.
Check inside for other files ./postinst and ./prerm using “vim” command
Command to check content for control.tar.gz file is below
$ tar -xzvf data.tar.gz

 ./usr/
 ./usr/bin/
 ./usr/bin/helloworld
Check ./usr/bin/helloworld is a binary file
In this section you will learn how to build full openwrt
Make sure the current directory “openwrt”
$HOME/openwrt
$ make -j1 V=s
It compile all packages
-j1: This option tells the build system work on one task at a time.
V=s: This sets the verbosity level to ‘s’, which means “silent” or “verbose.” When set to ‘s’, it makes the build system display more detailed information about what it’s doing. You’ll see the commands it’s running and the files it’s working on. This verbose output is helpful for understanding and debugging the build process.
Make sure the current directory “openwrt”
To check package is successfully compiled, below is the path
$HOME/openwrt/bin/targets/bcm27xx/bcm2711
To check the image file is present or not
$ ls -l

-rw-r--r-- 1 sysadmin sysadmin     1652 Jan  2 11:50 config.buildinfo
-rw-r--r-- 1 sysadmin sysadmin       83 Jan  2 11:50 feeds.buildinfo
-rw-r--r-- 1 sysadmin sysadmin 17117078 Jan  2 11:52 openwrt-bcm27xx-bcm2711-rpi-4-ext4-factory.img.gz
-rw-r--r-- 1 sysadmin sysadmin 17117925 Jan  2 11:52 openwrt-bcm27xx-bcm2711-rpi-4-ext4-sysupgrade.img.gz
-rw-r--r-- 1 sysadmin sysadmin     4207 Jan  2 11:52 openwrt-bcm27xx-bcm2711-rpi-4.manifest
-rw-r--r-- 1 sysadmin sysadmin 15350996 Jan  2 11:52 openwrt-bcm27xx-bcm2711-rpi-4-squashfs-factory.img.gz
-rw-r--r-- 1 sysadmin sysadmin 15351843 Jan  2 11:52 openwrt-bcm27xx-bcm2711-rpi-4-squashfs-sysupgrade.img.gz
drwxr-xr-x 2 sysadmin sysadmin     4096 Jan  2 11:52 packages
-rw-r--r-- 1 sysadmin sysadmin     2141 Jan  2 11:52 profiles.json
-rw-r--r-- 1 sysadmin sysadmin      912 Jan  2 11:52 sha256sums
-rw-r--r-- 1 sysadmin sysadmin       18 Jan  2 11:50 version.buildinfo
As we can see “image” is present then it is confirmed that fully image is successfull
Image file is openwrt-bcm27xx-bcm2711-rpi-4-ext4-factory.img.gz
To extract image file command and pathis below
Make sure the current directory “openwrt”
$HOME/openwrt/bin/targets/bcm27xx/bcm2711
$ ls -l

-rw-r--r-- 1 sysadmin sysadmin      1652 Jan  4 18:52 config.buildinfo
-rw-r--r-- 1 sysadmin sysadmin        83 Jan  4 18:52 feeds.buildinfo
-rw-r--r-- 1 sysadmin sysadmin  17117925 Jan  4 18:54 openwrt-bcm27xx-bcm2711-rpi-4-ext4-sysupgrade.img.gz
-rw-r--r-- 1 sysadmin sysadmin      4207 Jan  4 18:54 openwrt-bcm27xx-bcm2711-rpi-4.manifest
-rw-r--r-- 1 sysadmin sysadmin  15350996 Jan  4 18:54 openwrt-bcm27xx-bcm2711-rpi-4-squashfs-factory.img.gz
-rw-r--r-- 1 sysadmin sysadmin  15351843 Jan  4 18:54 openwrt-bcm27xx-bcm2711-rpi-4-squashfs-sysupgrade.img.gz
drwxr-xr-x 2 sysadmin sysadmin      4096 Jan  4 18:54 packages
-rw-r--r-- 1 sysadmin sysadmin      2141 Jan  4 18:54 profiles.json
-rw-r--r-- 1 sysadmin sysadmin      1025 Jan  4 18:54 sha256sums
-rw-r--r-- 1 sysadmin sysadmin        18 Jan  4 18:52 version.buildinfo
Command to extract full image file
$ gunzip -d openwrt-bcm27xx-bcm2711-rpi-4-ext4-factory.img.gz
After extracting image file check with ls command it will display below file
$ ls -l

 -rw-r--r-- 1 sysadmin sysadmin 184549376 Jan  4 18:54 openwrt-bcm27xx-bcm2711-rpi-4-ext4-factory.img
Content of full image file
Check image file using “vim command”
$ vim openwrt-bcm27xx-bcm2711-rpi-4-ext4-factory.img
In vim openwrt-bcm27xx-bcm2711-rpi-4-ext4-factory.img file search for binary file name (wait for a second)
In this case binary file is helloworld
The du (disk usage) that allows users to analyze and report on disk usage within directories and files.
Displays sizes in human-readable format, using units such as KB, MB, GB, etc.
$ du -h openwrt-bcm27xx-bcm2711-rpi-4-ext4-factory.img.gz

17M     openwrt-bcm27xx-bcm2711-rpi-4-ext4-factory.img.gz
As we can see size of image file is around 17M